Solution Overview:
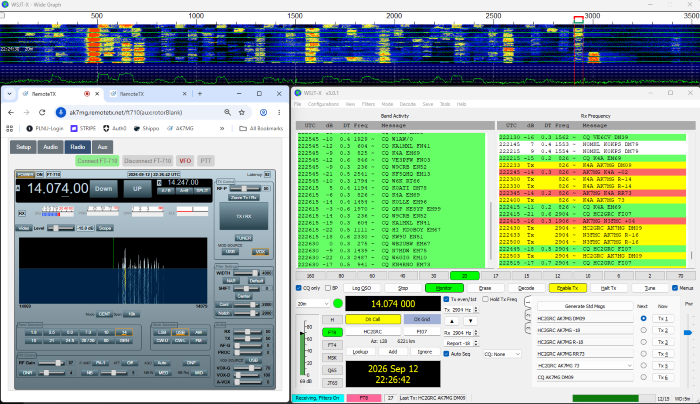
With the RemoteTx FT-8 solution approach, the WSJT-X software is run on the PC at the operator location. Radio control and audio streaming all goes through the RemoteTx web browser to the RTx Raspberry Pi at the remote location that the radio is attached to.
- PTT control is done by activating VOX on the FT-710 radio.
- Frequency and mode control is done directly with the RemoteTx web radio interface. WSJT-X does not send commands directly to the radio.
- Audio is routed through the browser using an audio bridging software, VB-Audio Cable.
(There is a small cost to use the A&B VB-Audio Cable.)
Below are step by step setup directions with screenshots using a Windows 11 PC.
Required Materials:
- VB-Audio Cable A&B software acquired from:
https://vb-audio.com/Cable/#DownloadCable
Configure Radio and WSJT-X for VOX control.
- TURN ON RADIO AND CONNECT TO IT WITH RemoteTx WEB INTERFACE
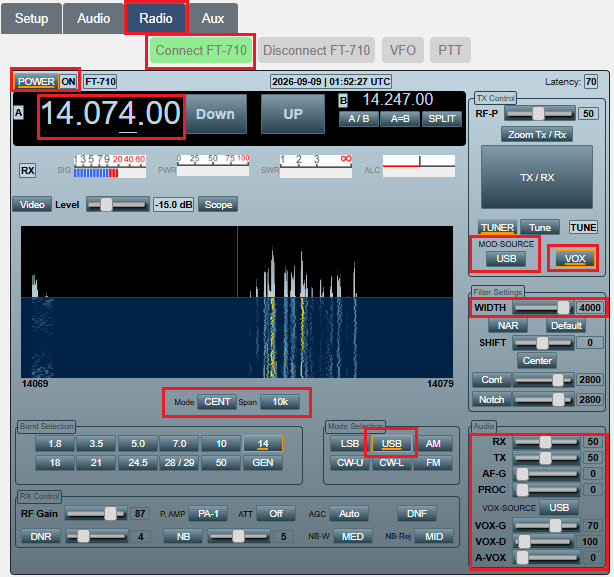
Log in to your RemoteTx radio web interface and turn on the radio and connect to it.
Set the controls like the screenshot below:
Freq: FT-8 frequency of the band you are using.
Mod-Source: USB
VOX: Activated
Filter Width: Max of 4000
Audio Controls: Set them like screenshot below
Make sure PROC is zero.
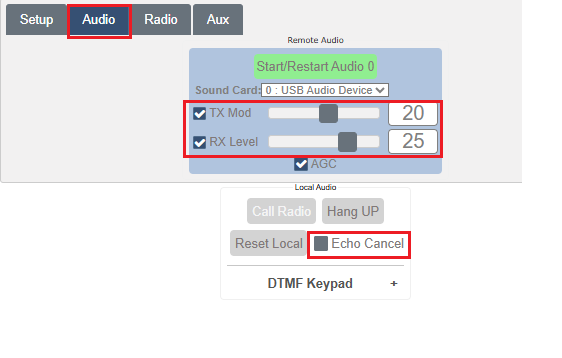
- SET AUDIO LEVELS IN AUDIO TAB
Set the Tx and Rx audio levels to 20 and 25 like the screenshot below.
Uncheck ‘Echo Cancel’ if it is checked. (IMPORTANT)
They can be adjusted later if needed.
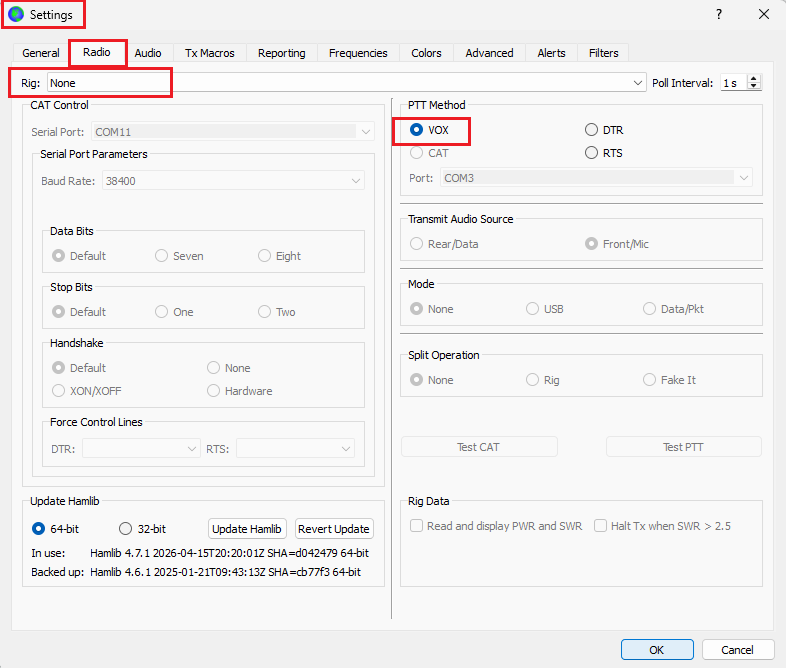
- Configure VOX in radio settings in WSJT-X
Open the WSJT-X settings panel and click on the ‘Radio’ tab and then configure the following settings:
Radio -> Rig: None
Radio -> PTT Method: VOX
CONFIGURE AUDIO BRIDGING BETWEEN RemoteTx BROWSER AND WSJT-X:
Audio bridging requires the purchase and download of an inexpensive audio utility, ‘VB-Audio Cable A&B’.
- DOWNLOAD AND INSTALL ‘VB-Audio Cable A&B’.
The download link is: https://vb-audio.com/Cable/#DownloadCable
The cost is about $15. - CONFIGURE SOUND CONTROL PANEL PLAYBACK TAB
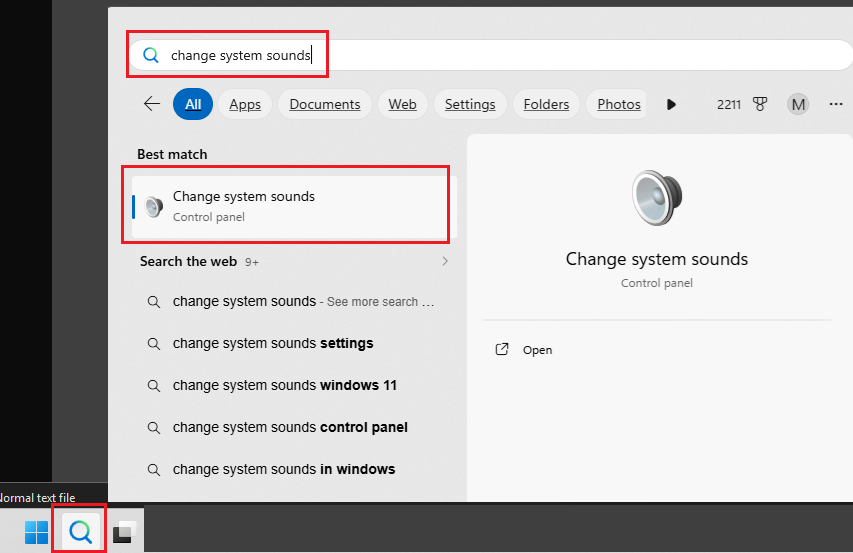
Open the System Sound Control Panel, by typing ‘Change System Sounds‘ in the Windows Search Interface.
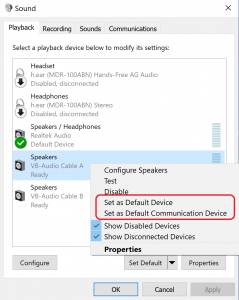
Then, click on the ‘Playback’ tab.
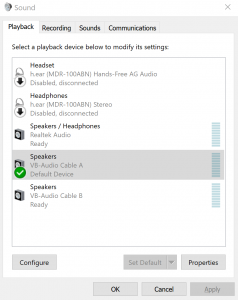
With a ‘right mouse click’ make the ‘Speakers-VB-Audio-Cable-A’ both the ‘Default Device’ and the ‘Default Communications Device’.
It should look like below when completed.
- CONFIGURE SOUND CONTROL PANEL RECORDING TAB
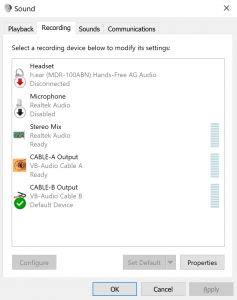
Click on the ‘Recording’ tab and then with a ‘Right Mouse Click’ disable everything except ‘Stereo Mix’ (if it exists) and Cable-A Output and Cable-B Output.
Then, with a ‘right mouse click’ make ‘Cable-B Output’ both the ‘Default Device’ and the ‘Default Communications Device’.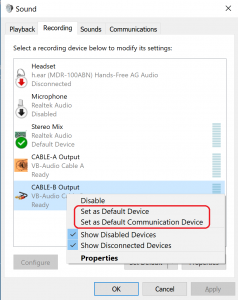
It should look like this:
- CONFIGURE CABLE-A SO YOU CAN ALSO HEAR RX AUDIO IN PC SPEAKERS.
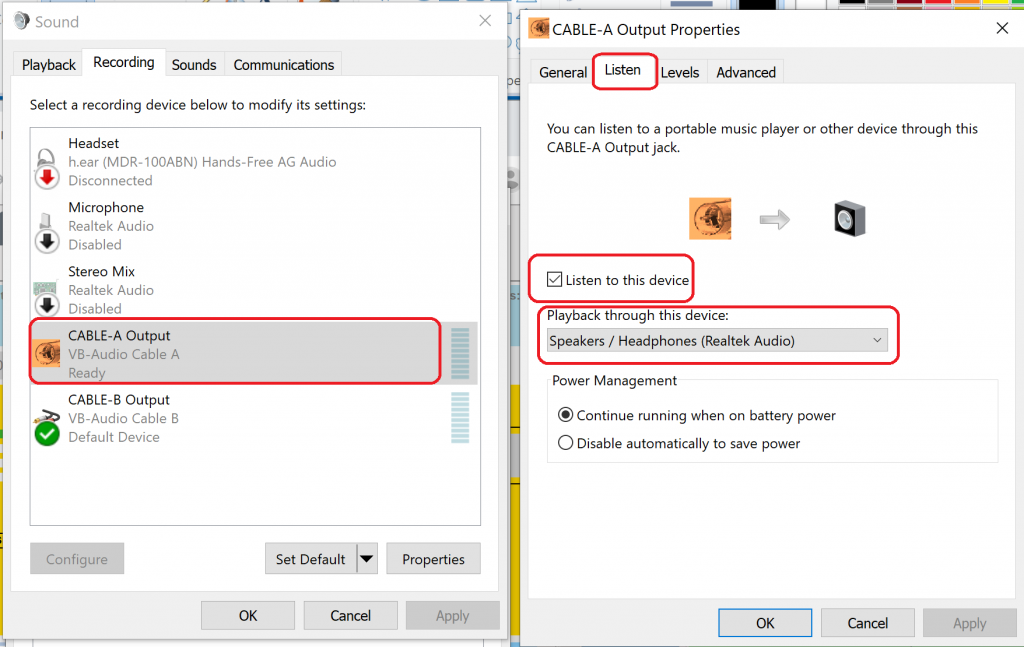
Double click on ‘CABLE-A Output’ to open the ‘CABLE-A Output Properties’ window and then select the ‘Listen’ tab.
Check the ‘Listen to this device’ and select your speakers as the ‘Play through this device’ choice.
This will make it so you hear the received radio audio that is also going to WSJT-X.
- CONFIGURE CABLE-B SO YOU CAN ALSO HEAR TX AUDIO IN PS SPEAKERS.
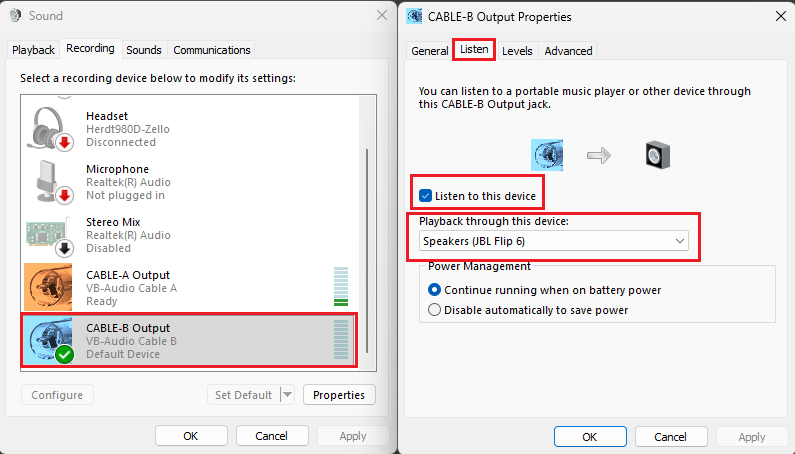
Double click on ‘CABLE-B Output’ to open the ‘CABLE-B Output Properties’ window and then select the ‘Listen’ tab.
Check the ‘Listen to this device’ and select your speakers as the ‘Play through this device’ choice.
This will make it so you hear your transmitted radio audio that WSJT-X is emitting.
- CONFIGURE WSJT-X AUDIO SETTINGS.
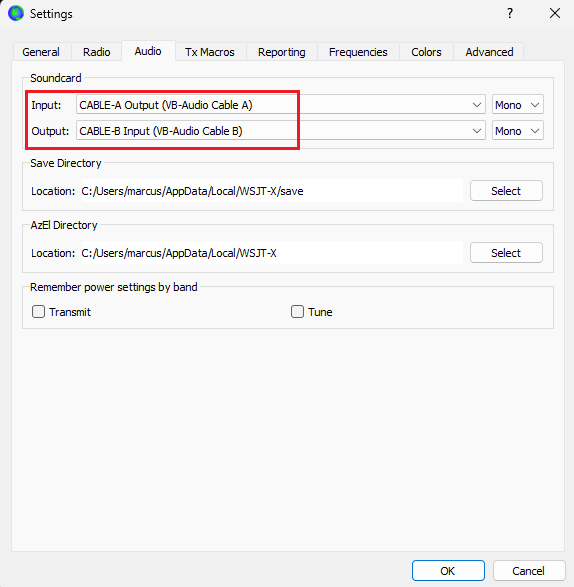
Open the WSJT-X settings panel and click on the ‘Audio’ tab.
Set Input and Output like this:
Input: to ‘CABLE-A Output (VB-Audio Cable A)’
Output: to ‘CABLE-B Input (VB-Audio Cable B)’
Audio bridging setup is now complete.
Final startup and operation of FT8:
- Close both WSJT-X and logout of the RemoteTx browser and close all browser windows.
(This is so that when the browser is re-launched it will apply the sound card changes that were made.) - Open a new browser window and log in to RemoteTx, and click on the radio tab and connect to your radio.
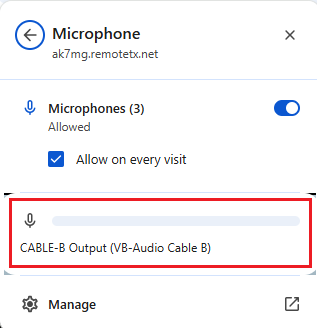
(Also, click on the browser microphone icon and verify it is using Cable-B Output.)
- Start WSJT-X and select the band that you want to operate on and note the operating frequency.
- On the RemoteTx web Radio control Tab, tune the radio to the FT-8 frequency and make sure that USB mode is selected and that VOX is enabled.
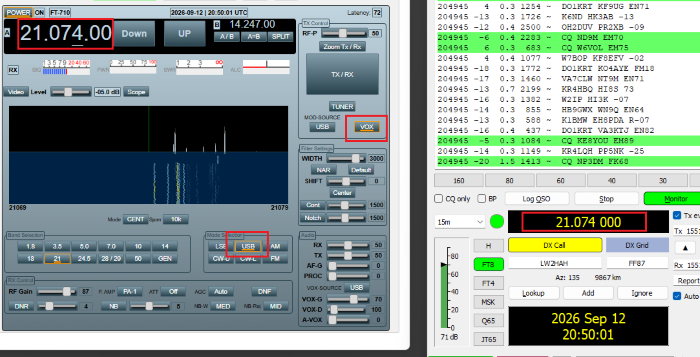
- You should now start to see transmissions decoding and be able to make FT-8 contacts.
Audio Adjustment Notes:
- TX Audio level should be adjusted, so you are seeing full power out, but very minimal ALC activity.
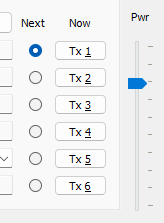
The 2 places you can make this adjustment are with the WSJT-X Pwr slider level at the right of the WSJT-X panel.
AND
the Radio Audio Tx slider.
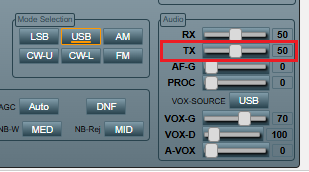
- You can click the Tune button in WSJT-X to put the radio in transmit, then adjust tx levels while watching the PWR and ALC values in the web browser.
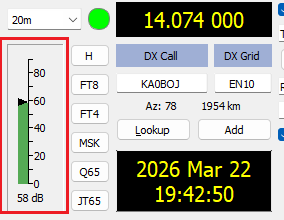
- RX Audio can be adjusted with the Radio Audio Rx slider.
Generally, this should be set so that you get a green level in WSJT-X of 60 dB or a little higher.
FINAL RESULT: