Configure Radio Control.
WSJT-X will be configured to control the 7300MK2 via CAT commands using the RemoteTx WebSerial feature through port ACM-1. Additionally, 2 CP2102 USB/TTL serial adapters will be wired in a loopback configuration to bridge the serial connection between WSJT-X and the RemoteTx WebSerial browser connection.
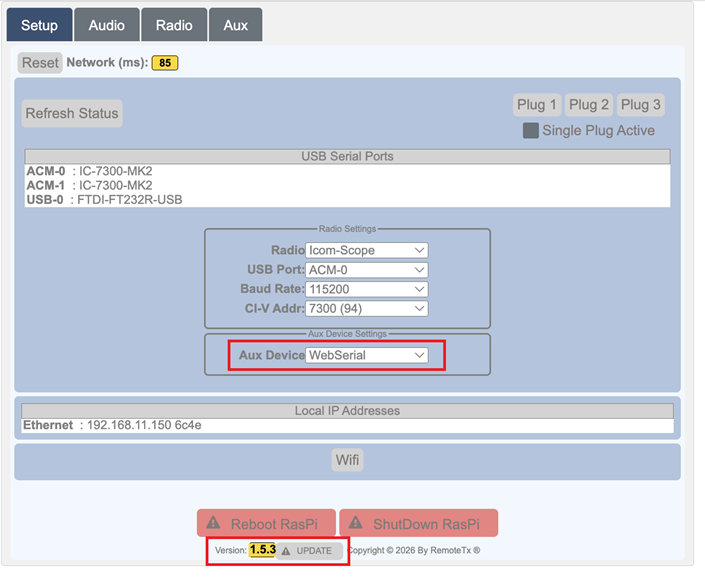
- Make sure that the Version of RemoteTx is set to 1.5.3 or later. Click Update button and a reboot, will bring it to the latest.
- In the radio menu settings, change the CIV Address of your 7300MK2 from the default of B6 to 94 (7300 default) so that the WSJT-X software can connect to it.
Menu -> Set -> Connectors -> CI-V -> CI-V Address: 94h.
(Later, when you use the RemoteTx Web Browser to connect to the Radio, you will need to choose 7300 (94) instead of 7300MK2 (B6).) - Purchase and wire up two CP2102 USB/TTL serial adapters in a loopback/crossover configuration and plug into a USB-C port on the Mac.
(Rx terminal connected to Tx terminal both ways. Also make sure to connect a Gnd to Gnd wire.)
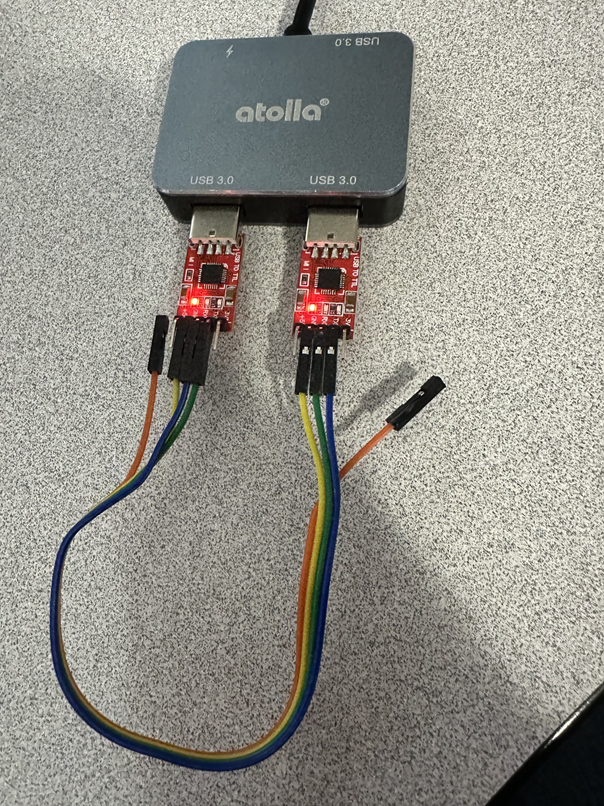
https://www.amazon.com/hiBCTR-CP2102-Converter-Adapter-Downloader/dp/B0DSYXTFX6
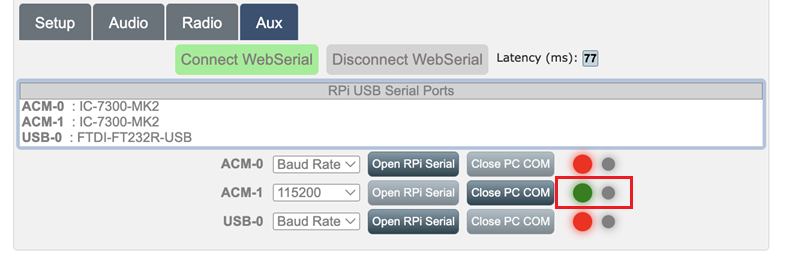
https://www.amazon.com/dp/B08X4LHP1B - Connect to your station with the RemoteTx browser and under the Setup Tab, in the Aux menu, select WebSerial.
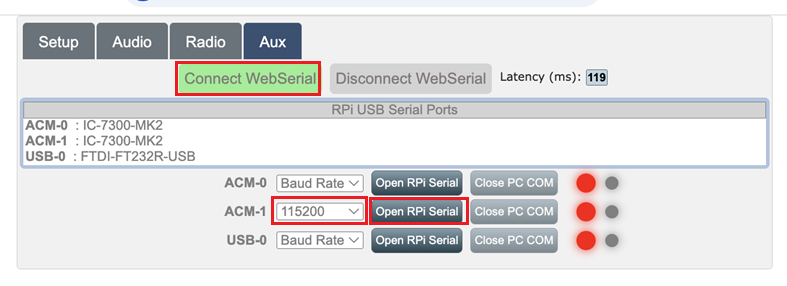
- Click on the Aux tab and click on Connect WebSerial green button. Then, select the ACM-1 port, set it to 15200 baud and click Open RPi Serial.
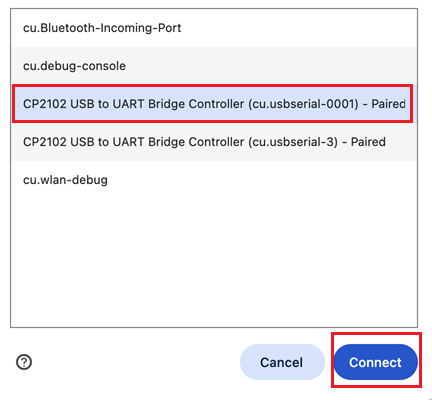
- Choose the cu.usbserial-0001 port and click Connect.
ACM-1 port indicator should turn Green and look like below.
- Launch the WSJT-X software and go to Preferences and click on the Radio settings Tab.
Choose the Icom 7300 Radio, and set the Serial Port, Baud Rate and PTT Method like the screen below: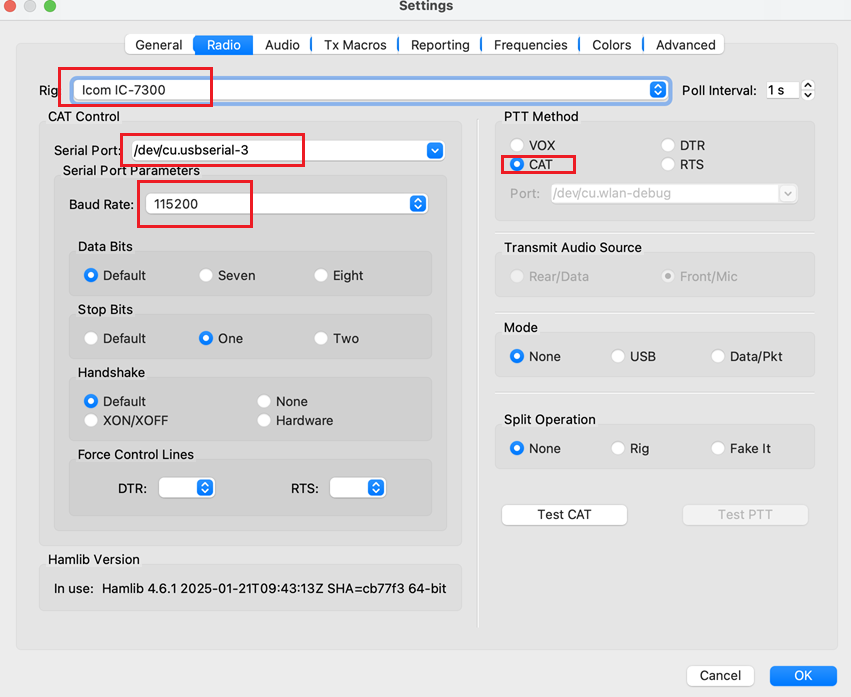
- Click OK and WSJT-X should successfully connect to the radio and display the current frequency.
Configure Audio Connections.
Audio from WSJT-X is transported to the 7300MK2 via the RemoteTx web browser using virtual audio bridging utilities. The following example uses a utility purchased at low cost from VB-Audio Cable that is easy to set up and works very well. (Blackhole should work as also.)
- Purchase and Install VB-Cable A&B for Mac from:
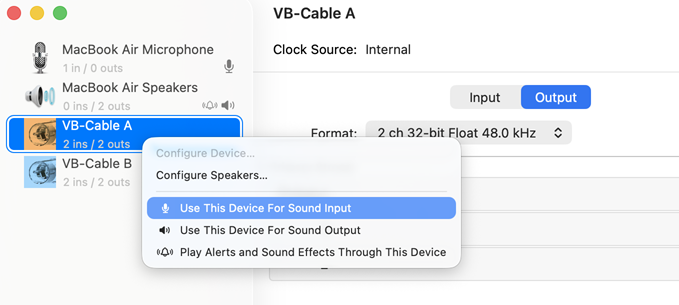
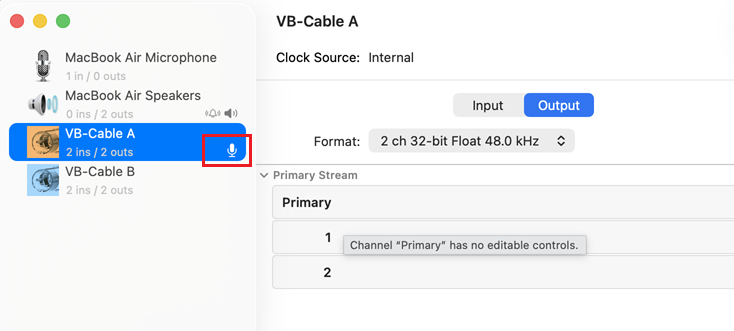
https://shop.vb-audio.com/en/mac-apps/30-vb-cable-ab-mac.html - Open the Audio Midi Setup control panel on the Mac.
- Set VB-Cable A as the Sound Input device by Right Mouse Clicking (RMC) on it and then selecting ‘Use This Device For Sound Input’.
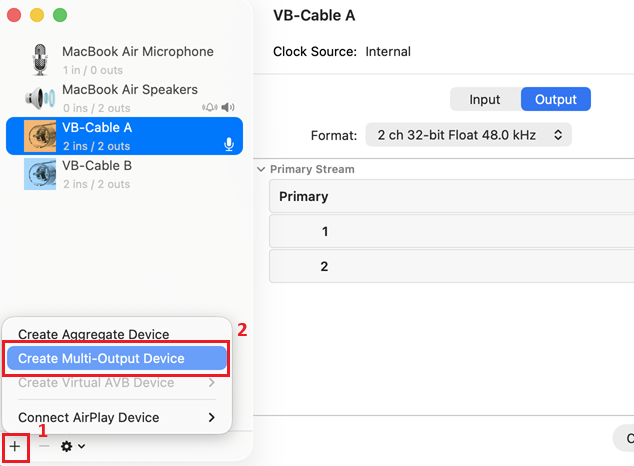
- Create Digital-Rx Multi-Output Device:
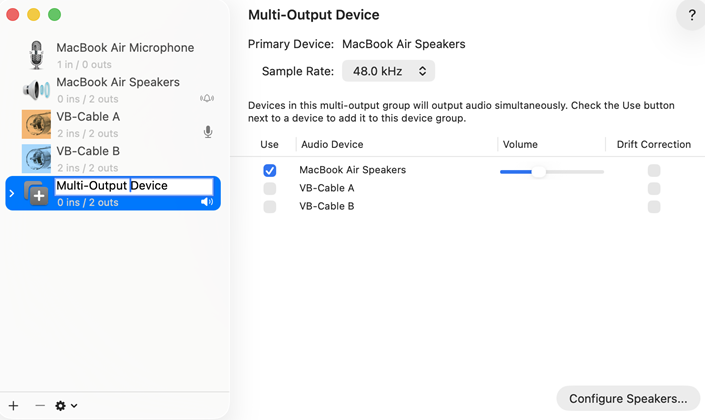
Click on the ‘+’ button at the bottom left of the Midi Setup panel, then choose Create Multi-Output Device.
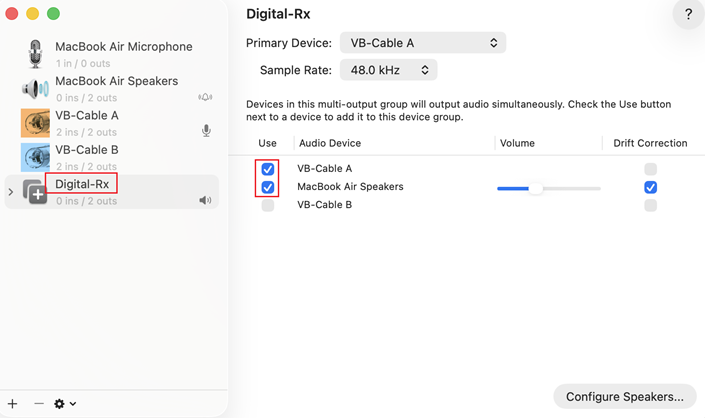
This will create a Multi-Output device that you want to re-name to Digital-Rx by clicking on the label and changing it’s title.
Once you have Renamed it, on the right panel, under the Use column, check both VB-Cable A and MacBook Air Speakers.
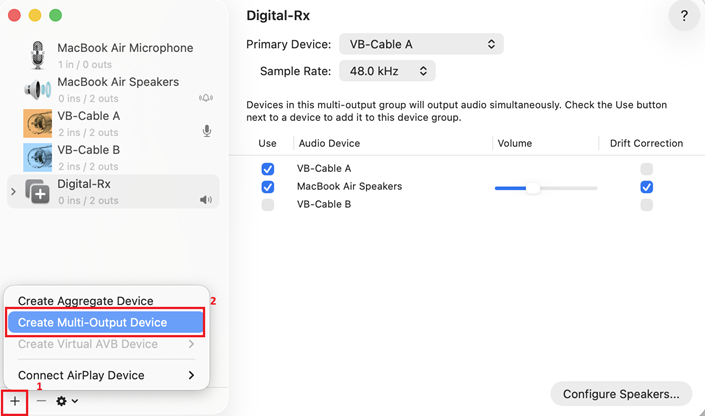
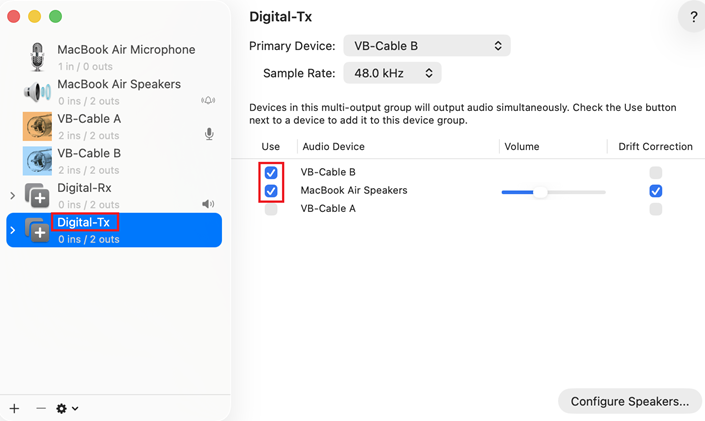
- Create Digital-Tx Multi-Output Device:
Click on the ‘+’ button at the bottom left of the Midi Setup panel, then choose Create Multi-Output Device.
This will create a Multi-Output device that you want to re-name to Digital-Tx by clicking on the label and changing it’s title.
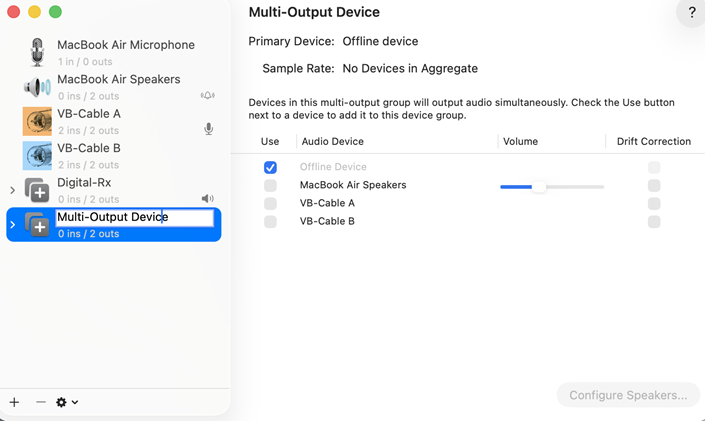
Once you have Renamed it, on the right panel, under the Use column, check both VB-Cable B and MacBook Air Speakers.
- Set the WSJT-X Audio Panel Input and Output so that it looks like this:

This completes the Radio control and Audio setup for WSJT-X.
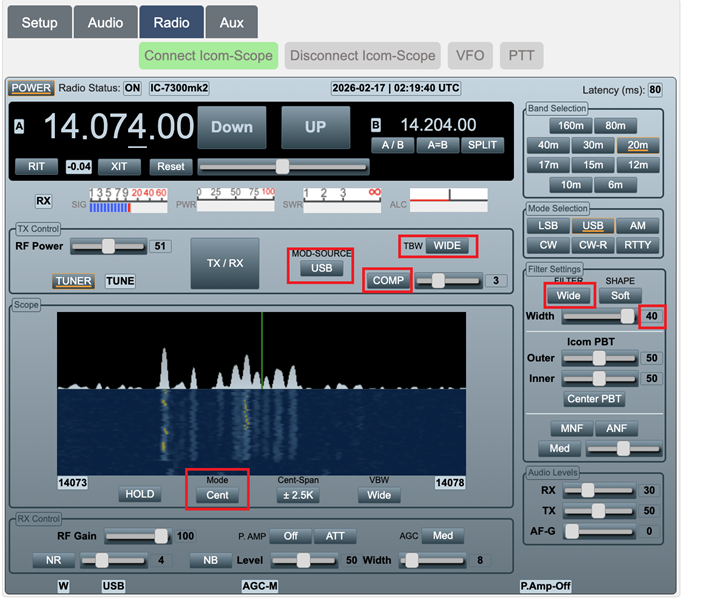
Next Check that these radio settings are set:
Transmit Band Width: Wide
Mod-Source: USB
Compression: OFF (Important!!)
Filter: WIDE
Scope Mode: Center (This is nice to seen RX and Tx signals.)
Final Audio Adjustments:
- Adjust Input (RX) levels so that WSJT-X stays in the Green.
- Adjust Output (TX) levels so that you see full power out when transmitting, but no ALC register.
If you see a significant ALC register, turn down TX levels until you still have full power, but no ALC.
You should now be able to connect to the Radio with the RemoteTx web interface, and control and operate FT8 using WSJT-X.