The WebSerial feature of RemoteTx allows a device that normally is controlled with a serial port locally plugged into a computer to be controlled remotely with a serial port connection through the RemoteTx web browser. This page describes how to set up remote control of a USB Winkeyer plugged into a RemoteTx Raspberry Pi using N1MM+ software configured for RTTY FSK. The solution uses windows com0com serial port bridging software to connect N1MM+ software to the RemoteTx WebSerial browser connection. For this reason com0com software needs to be installed.
This approach can also be used with other serial controlled radios, devices and software.
Setup Steps:
- Download and install com0com software from:
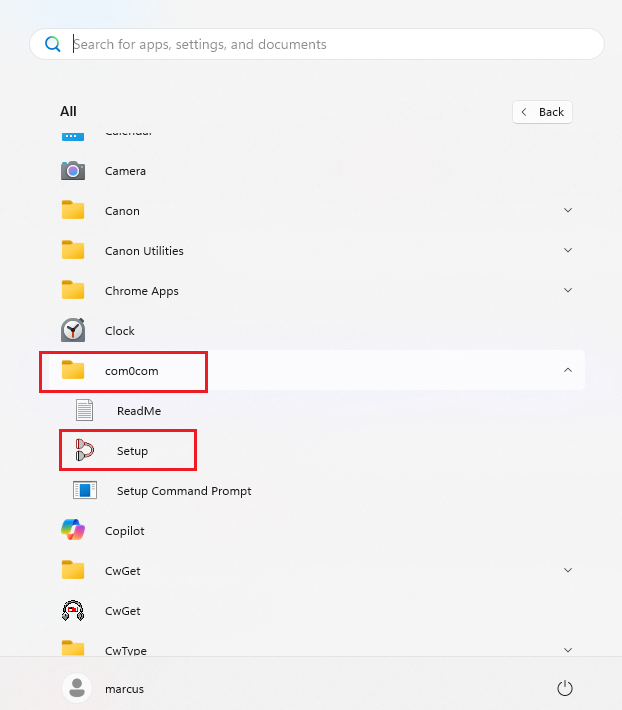
https://remotetx.s3-us-west-1.amazonaws.com/com0com-2.2.2.0-x64-fre-signed.zip - Find and run the com0com setup utility:
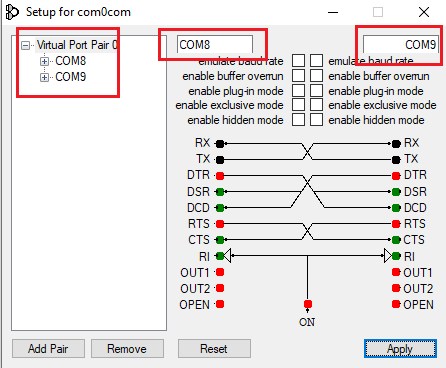
- Add a Virtual Port pair choosing something like COM8 and COM9. (These ports will be used for this tutorial.)
- Plug the Winkeyer USB port into the RemoteTx Raspberry Pi with a USB cable.
- Connect the PTT1 and Key1 lines of the Winkeyer to the appropriate Send and RTTY lines of the radio with a compatible cable.
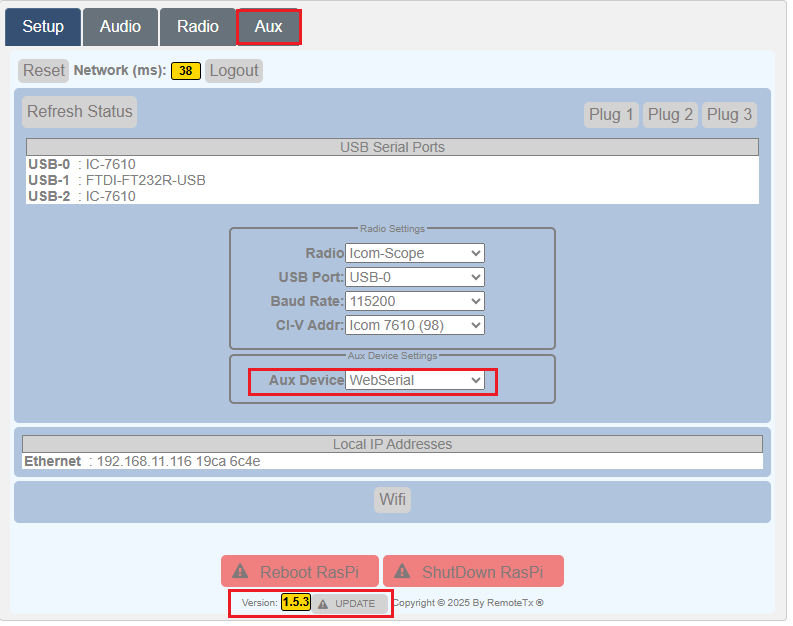
- Log in to your RemoteTx web account and check that the Version at the bottom of the Setup tab is 1.5.3 or later.
If it is 1.5.2, click the Update button, wait about 5 seconds for it to update, then reboot the Raspberry Pi. - Choose WebSerial from the Aux Device list and then click on the Aux tab.
- Click on the Connect WebSerial button and you should see a USB port appear from the Winkeyer USB port.
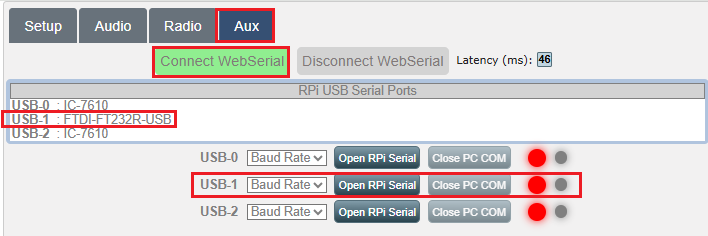
- Select a baud rate of 1200 for the USB port which is the USB port of the Winkeyer. (USB-1 in this example.)
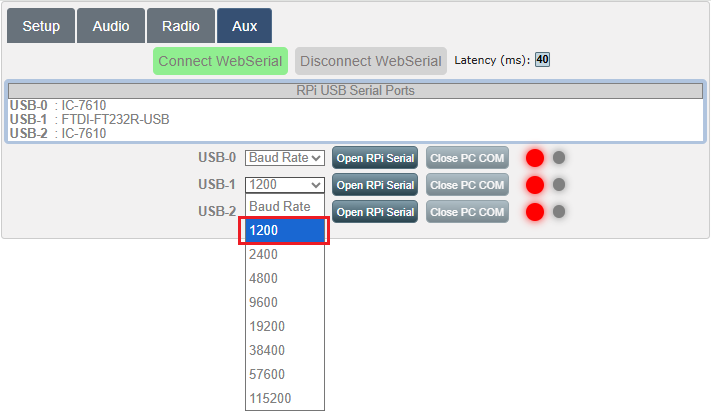
- Click the ‘Open RPi Serial’ button.
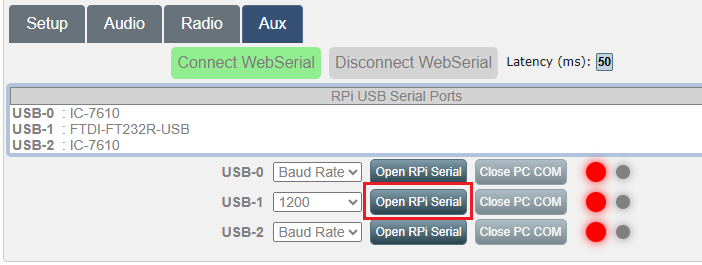
- Choose port COM8 and then click Connect.
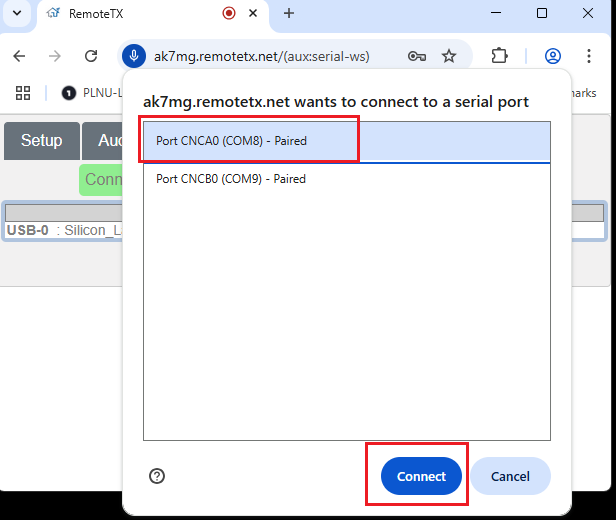
- You should see the connection status change from Red to Green indicating the web browser has successfully connected to COM8.

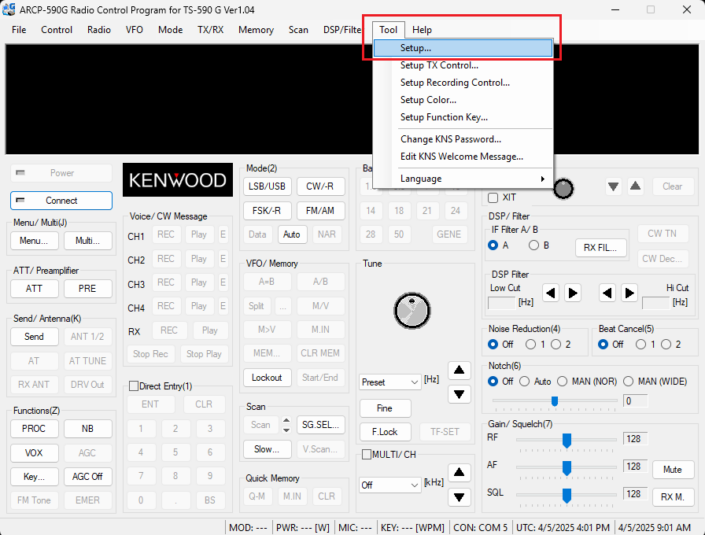
- Start the Kenwood ARCP-590G software and choose the Setup option from the Tool menu.
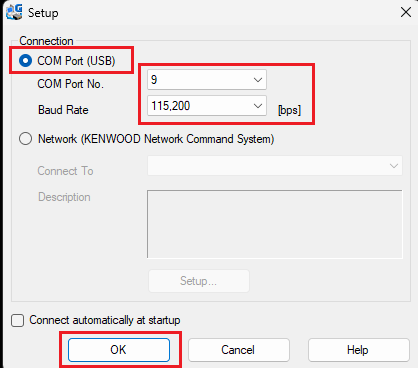
- Choose Com Port 9 and Baud Rate 155200 and click OK.
- Click the Connect button to connect to the radio and control it remotely.
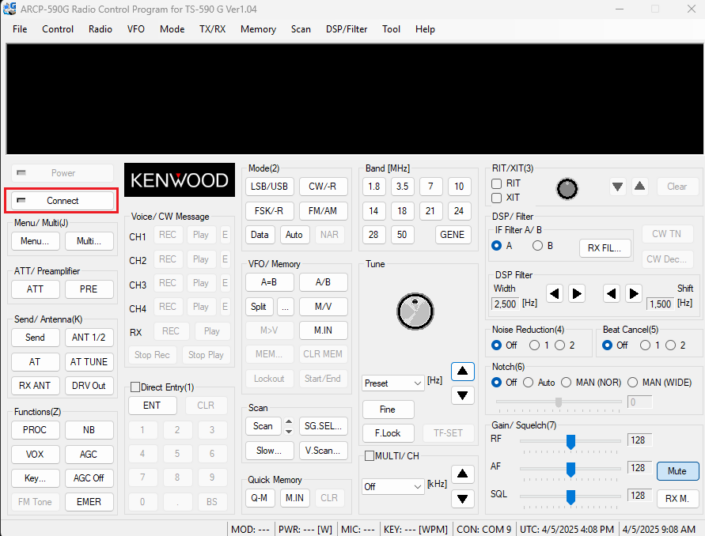
- The ARCP software should connect to the radio and you should see the amber activity LED flicker on the WebSerial Aux control tab.
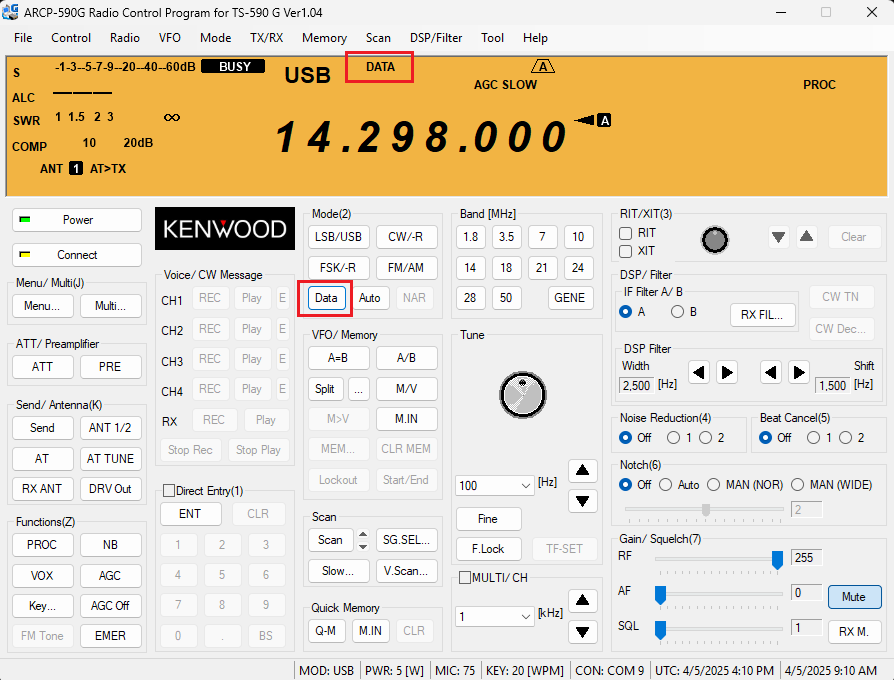

- ALSO, the Kenwood TS-590sg must be switched to DATA mode for the audio source to come from the USB cable. Click on the Data button to put the radio in Data mode as shown in the screenshot above.
- AUDIO settings:
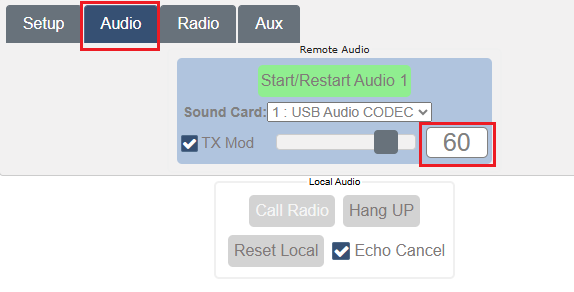
Click on the Audio tab, select Sound Card 1: USB Audio Codec, and then click the Green Start/Restart Audio button. Wait about 15 seconds and you should see the Call Radio button appear and automatically connect the computer to the audio from the radio. Set the settings and level as in the screenshot below:
